In My Sourdough Era
And I'm obsessed.

I’m proud of myself.
After months of putting this off… I grew a starter from scratch and now can make whatever sourdough baked goods my little heart desires. (It’s a pro and a con, let’s be real).
I procrastinated starting a starter because I thought it was hard and that I wouldn’t be able to get it right.
I was afraid of failing and it all being a waste.
Turns out it was (fairly) easy. Like, a 3/10 in difficulty.
The hardest part was persevering when I thought it wasn’t working.
Let me be the one to tell you that if you’ve been wanting to join the sourdough bandwagon, you can do it!
It just takes a little bit of time, patience, a tiny bit of algebra, and some learning.
And it’s worth it because a fresh baked homemade loaf of sourdough tastes just like bread from a restaurant… Fresh, warm, chewy, and delicious. Nothing better.
This blog post will be all about my process, tips, and what I’ve learned from making a starter and sourdough from scratch.
The Starter
If you don’t know what I’m talking about when I say “starter”, it’s the key ingredient necessary to make a bubbly sourdough loaf.
A starter is a combination of water and flour (either whole wheat or all-purpose, or a combination of the two). The water and flour have been set long enough to ferment to create natural yeasts and bacteria. It’s a live, fermented mixture. You have to keep it alive by continuously feeding it flour and water.
Typical loaves of bread use yeast to help the bread rise and become chewy. Sourdough doesn’t use any actual yeast, just an active sourdough starter.
You can create a starter yourself, as I did, or you can buy a starter from a bakery, buy a dried starter online, or get some starter from a friend who has one (I’ll gladly share mine!).
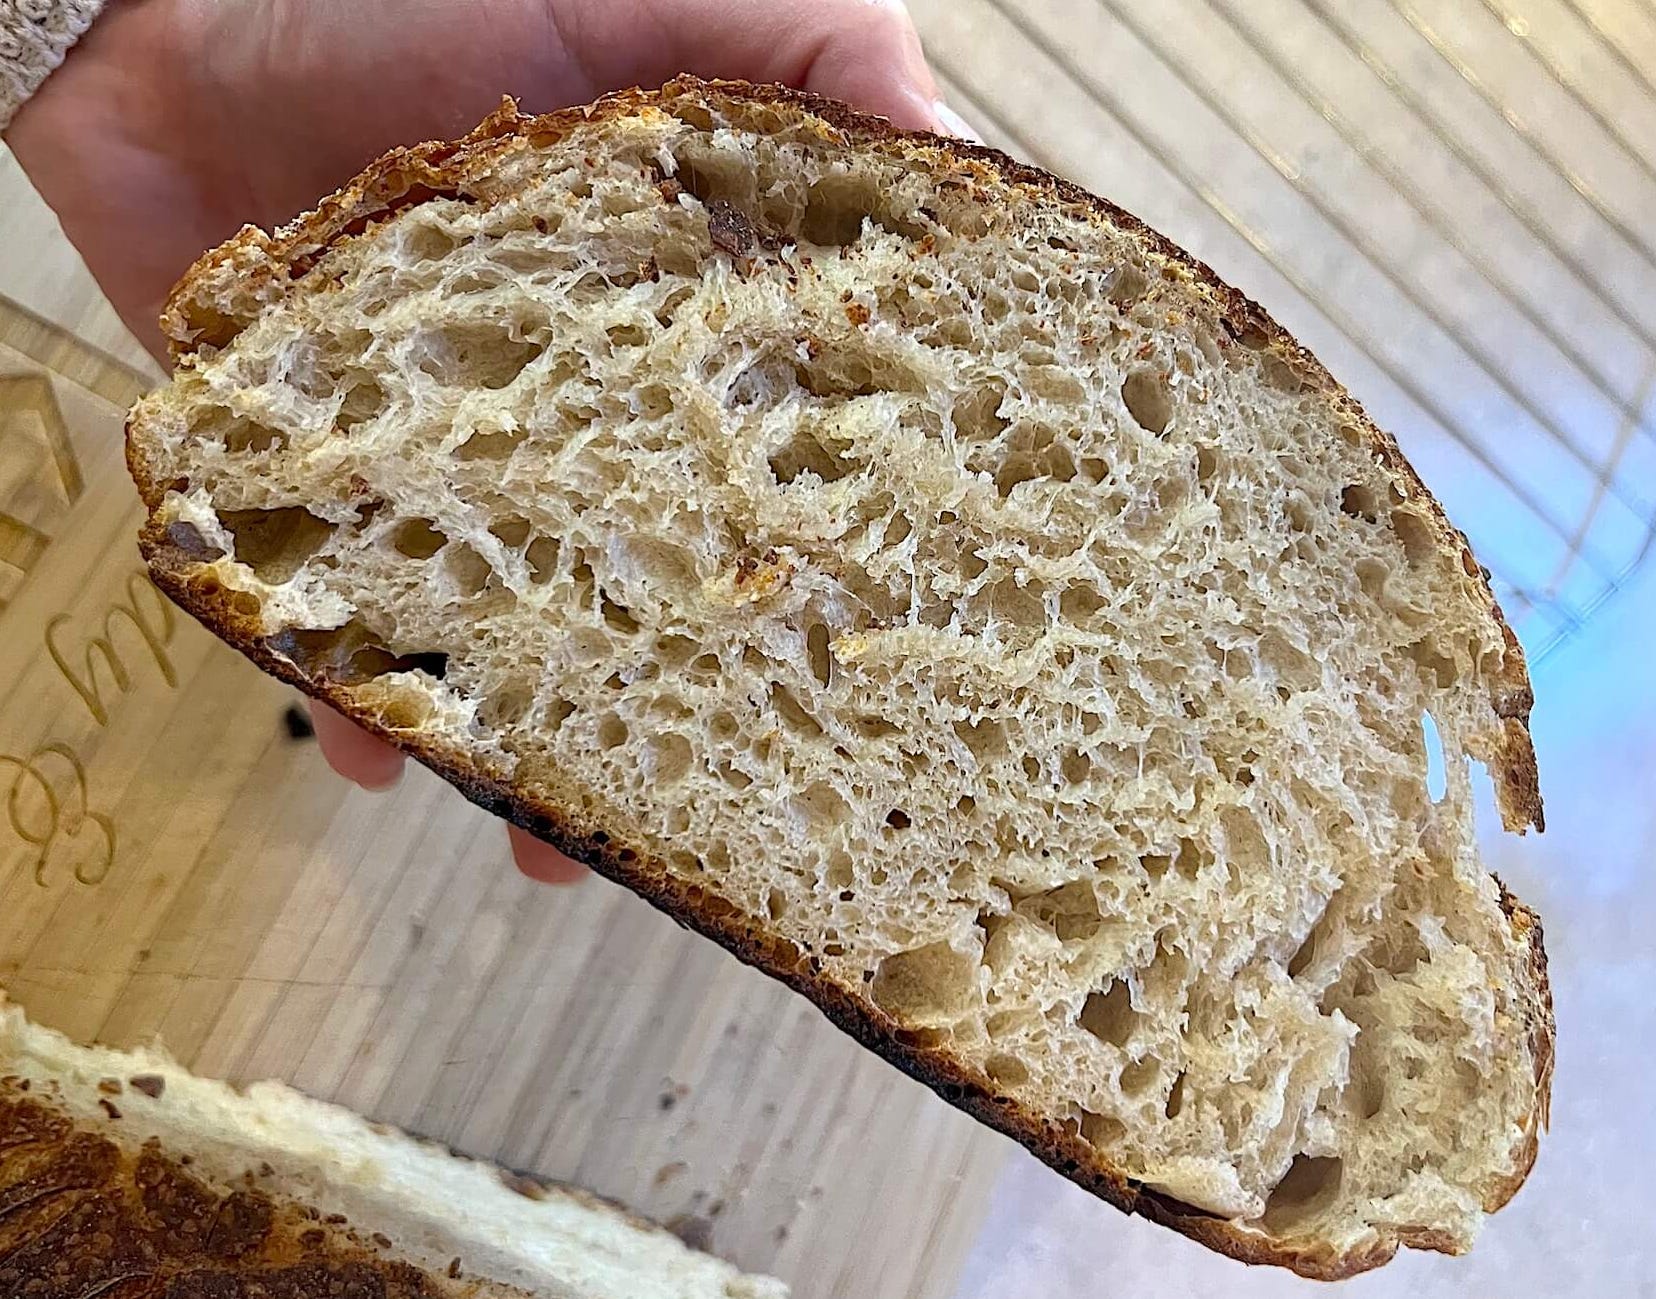
My starter is made of whole wheat flour, rather than all-purpose, and it works great for me. My loaves have been crispy and bubbly from the get-go!
Creating a Starter from Scratch
I followed Jesha’s sourdough starter guide and recommend downloading that for full details.
Here’s the TLDR;
What You’ll Need:
Wooden spoon
Kitchen towel
Filtered water
Jesha recommends whole-wheat flour, as it typically ferments quicker than an all-purpose starter. Using whole-wheat flour worked great for me, so I’d recommend trying whole-wheat.
Creating a starter is just a consistent process of feeding your starter flour and water, discarding half the next day, and feeding it flour and water again.
Feed, discard, feed, discard…
Why discard? You discard so that you don’t have to feed the starter as much the next day. Imagine if you kept feeding your starter without discarding it, you’d have to feed it double the amount the next day, and this would exponentially grow your starter to unwieldy amounts.
Discarding also ensures that new flour/food is being introduced to the starter.
Once you have an active starter, you can save the discard to use for other recipes or revive it as an active starter in the future.
The Process
Day 1: Start this in the morning. Using a food scale, add 40g whole-wheat flour and 40g filtered water into your empty jar. Stir with your wooden spoon until there are no dry spots and cover with a kitchen towel. Keep it in a warm-ish spot but not in direct light. You want to keep it around 70-80° F at all times. Find a spot in your house that is consistently between those temperatures.
Day 2: 24 hours later, discard half. It doesn’t have to be exact. After discarding, feed it 40g whole-wheat flour and 40g filtered water. Stir. Cover. Set aside.
Day 3: Same as day 2. Discard, feed 40g flour & 40g water, mix, cover, and set aside.
Day 4: Here’s where you’re going to start feeding it twice a day. In the morning, discard, feed, and set aside as you normally would. 10-12 hours later, do this process again — discard, feed, mix, cover, and set aside. That’s why I recommend starting your starter in the morning on Day 1. You wouldn’t want to start it at 2 pm because once you start feeding it twice a day, you’d have to feed it around 2 am. No one wants to be thinking about their starter in the middle of the night.
Day 5 - 7: Same as day 4. Feed twice.
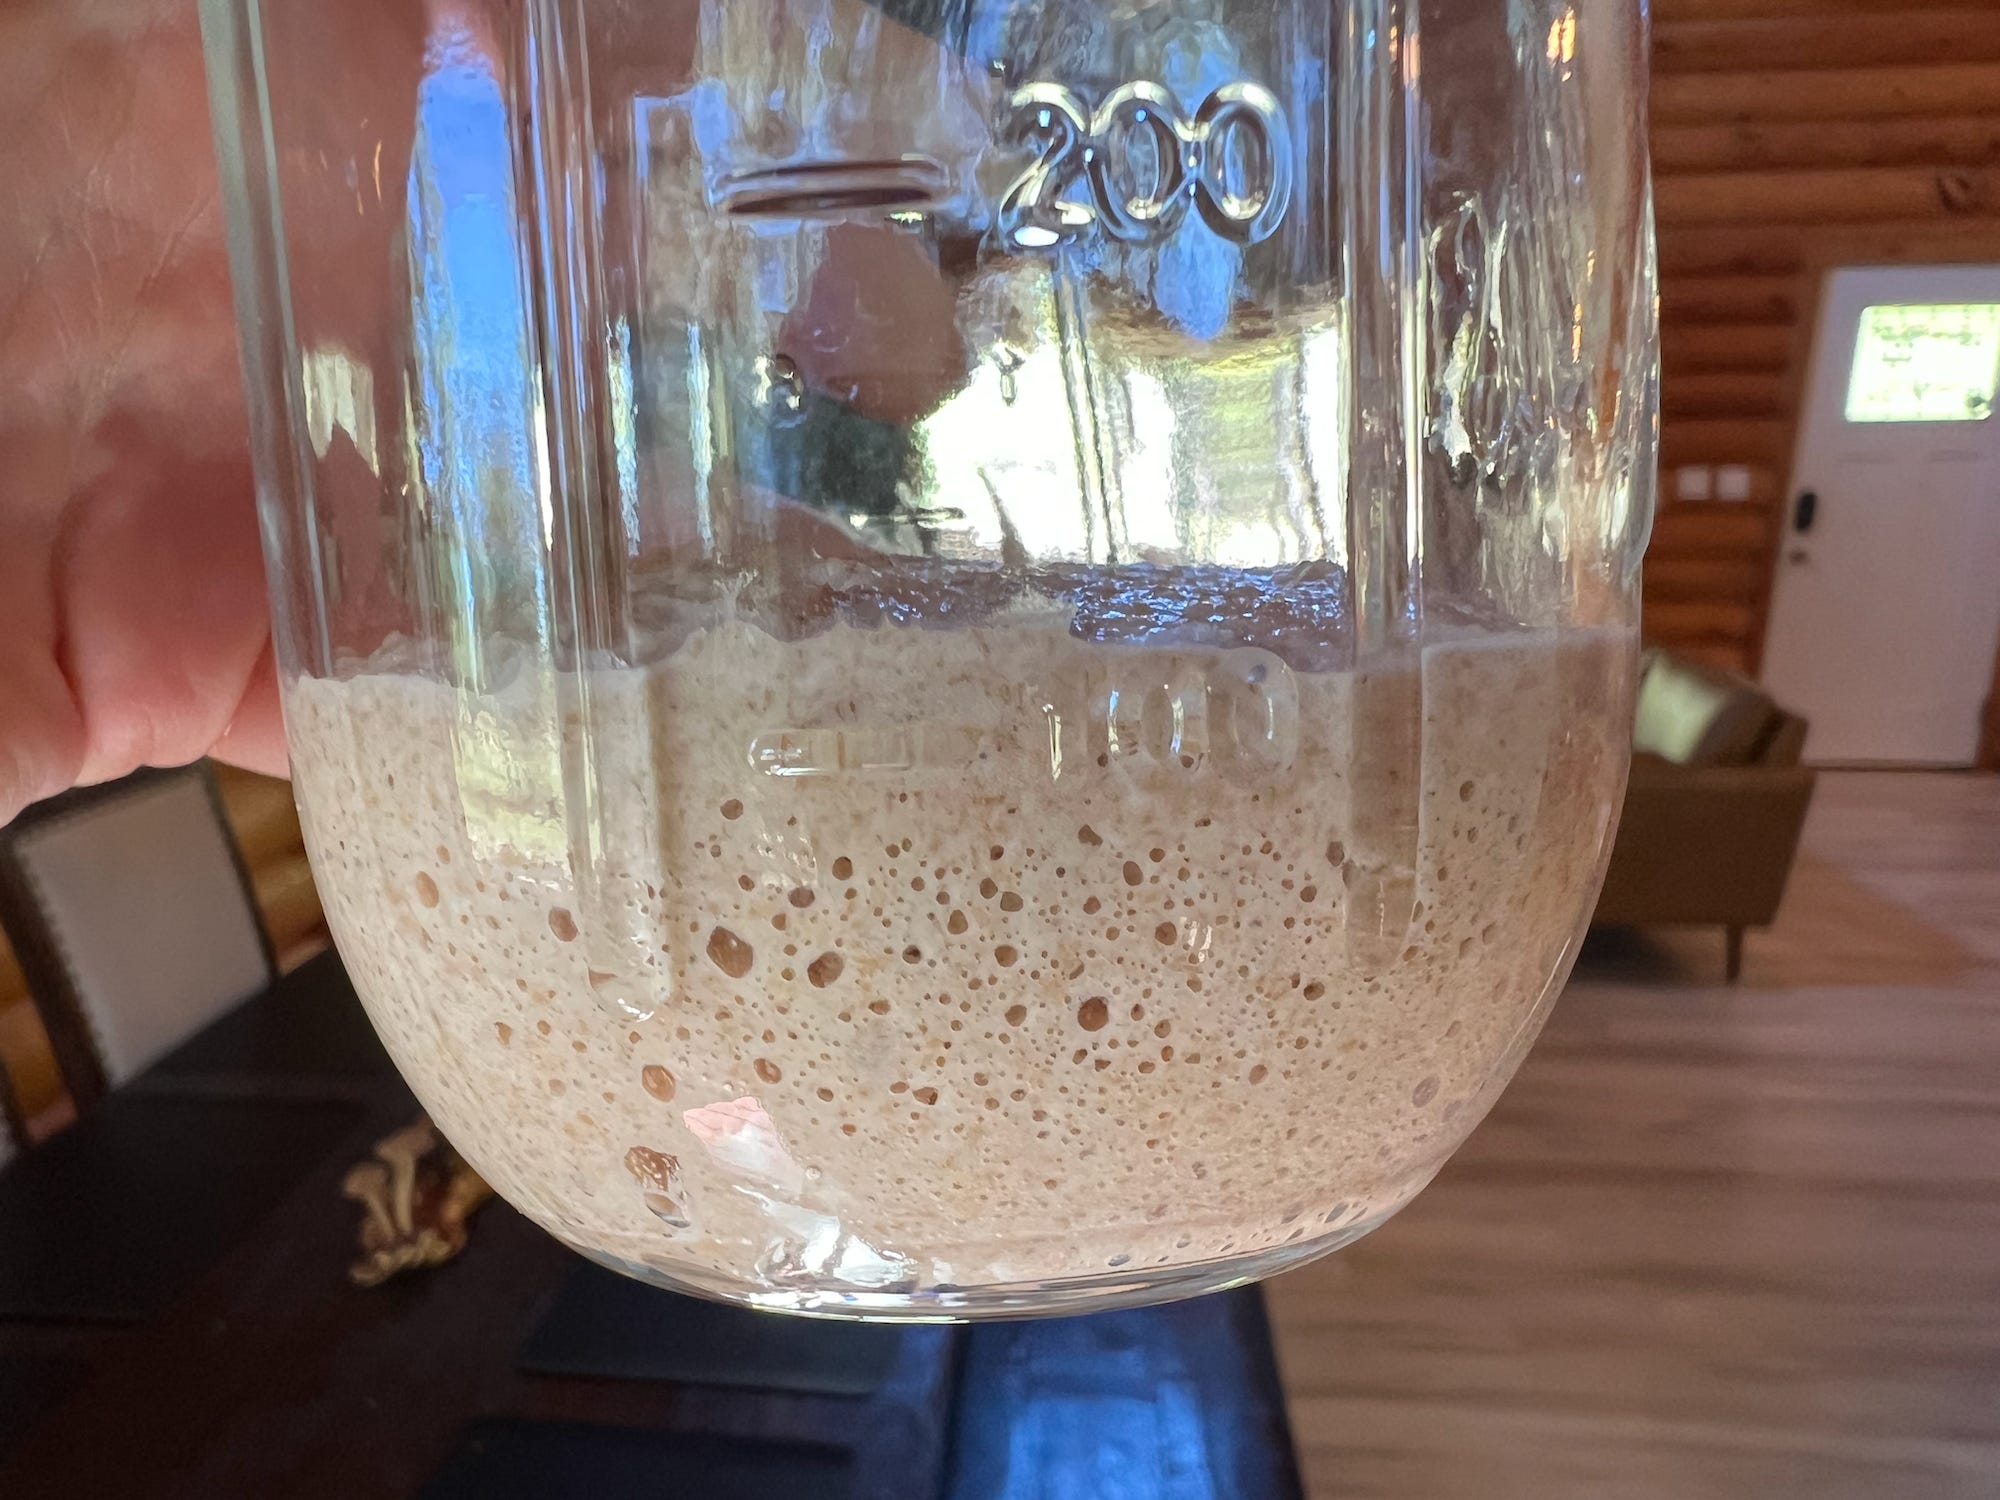
Around Day 7, your starter may be active! You can tell your starter is active when it’s bubbly, looks spider webby when you first stir it, and doubles in size 6-12 hours after you feed it.
Don’t worry if it’s not ready on Day 7! Mine took about 10 days to become active, that’s why patience and perseverance are key. Temperature and altitude can affect how quickly your starter becomes active. Keep feeding twice a day until your starter becomes active.
When your starter is active: again, you can tell because it doubles in size, is bubbly, and looks stringy when you stir it!
You’re ready to bake with your starter now!
Next Steps and Keeping It Alive
Depending on how often you want to bake, you can either keep your starter out or put it in your fridge.
Baking 2+ times per week: Store at the usual temperature, between 70-80° F, and feed it once or twice every day (same feeding process: discard, and feed).
Baking once a week or less: Store in the fridge and feed once a week. When you want to bake, take it out of the fridge 3 days beforehand. Stir the starter and discard everything but 2 tablespoons. Feed 40g flour and 40g water. Feed once or twice a day up to the day you want to bake. Your starter should be bubbly and stringy again by the time you want to bake.
How much to feed it to maintain and to bake?
To just maintain my starter, I feed it 40g of water and 40g of flour.
When you want to bake, and if you want to bake multiple things at once, you’ll need to have enough starter for each recipe, while still having some starter leftover in order to maintain it.
For example, say I wanted to bake 2 sourdough loaves and some sourdough cookies tomorrow.
The sourdough loaves need 80g of starter each, so I’d need 160g total for two loaves. And the cookies need 30g of starter. So I’d need 190g of starter tomorrow.
You’d want to be able to use this much starter and still have some starter leftover in order to keep your starter going.
If I needed 190g tomorrow, assuming I had about 40g of starter when I went to feed it, I’d feed it 100g flour, and 100g water. That feed just added 200g of volume to my starter. That way, when I go and use the 190g of starter tomorrow, I still have 50g of starter leftover in order to feed it and maintain it (40g to begin + 200g feed - 190g baking = 50g leftover).
I’d then feed my starter after I took out what I was baking with in order to maintain it.
Math…
What To Make Once Your Starter Is Active
The possibilities are endless, but here are my favorite recipes that I’ve tried so far:
Jesha’s Beginner Sourdough Loaf: I’ve made like, 10+ of these. The bottom of mine burns at 450 - 500° F, though. I’ve found my sweet spot is baking at 350°-400° covered, for 20 minutes, and uncovered for 15 - 18 minutes, also at 350°-400°. Still figuring out what works best for me and my oven.
Sourdough Chocolate Chip Cookies: Admittedly, I’m craving these immediately. I’ve made these twice, both times for friends and they were absolutely a hit. The 2nd time I let mine ferment overnight, rather than just for 8-10 hours. They spread out more the longer they fermented and were a bit softer, but I maybe could have baked them for a few more minutes. Still unbelievably delicious.
Sourdough White Chocolate Macadamia Nut Cookies: I might like these better than the OG Chocolate Chip 🤭
Blueberry Poptart: Tastes like a pie. So good and flaky.
Any sandwich using sourdough.
Breakfast mixes to pile on top of a sourdough slice (sausage and eggs with veggies).
Avocado toast.
Just a good ol’ piece of toasted sourdough with salted grass-fed butter. Nothing better.
I hope you learned something new in this post and became inspired to create your own sourdough goodies. They’re truly some of my new favorite creations.
Please leave me a comment and a heart ❤️ if you liked this post and recipe! Subscribe if you want recipes and cooking inspiration delivered straight to your inbox.
I hope you feel inspired to cook and create rather than order and wait.
THANK YOU, LOVE YOU, BYE!
Erin